AC Not Cooling the House Enough: Causes and Fixes Homeowners Can Tackle
This post contains affiliate links. As an Amazon Associate, I earn from qualifying purchases at no extra cost to you.
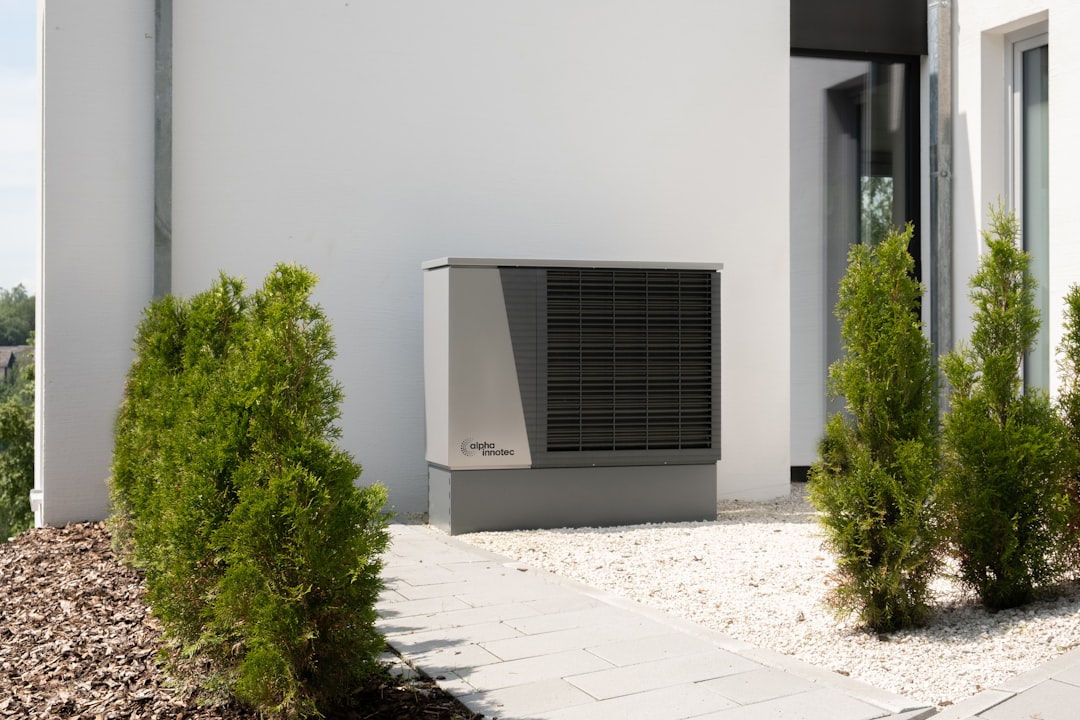
Photo by alpha innotec on Unsplash
If your AC is running but the house just won’t cool down, you’re not alone. This is one of the most common complaints homeowners have during summer, and the good news is that many of the causes are completely fixable without calling a technician. Before you schedule a service call, work through this guide - you may find the problem and the solution on your own.
Safety Note: Some of the causes below involve electrical components and refrigerant. If you suspect a refrigerant leak (hissing sounds, ice on lines, or the system runs constantly but never cools), do NOT attempt to recharge refrigerant yourself. R-410A and other modern refrigerants require EPA 608 certification to handle legally. Call a licensed HVAC technician. Also, if your system is older and uses R-22 (Freon), be aware that R-22 is no longer manufactured - servicing these systems is expensive. Any time you work near your air handler or electrical disconnect, make sure to turn the system off at the thermostat AND the breaker before touching anything. Install a carbon monoxide detector near your HVAC system if you don’t already have one - pick up a First Alert CO detector as a basic safety measure.
Start Here: The Most Common Cause Is a Dirty Air Filter
A clogged air filter is the single most frequent reason an AC system runs but fails to cool. When the filter is blocked, the system can’t pull enough air across the evaporator coil. The coil gets too cold, ice forms on it, airflow drops further, and the whole system goes into a losing battle trying to cool air it can barely move.
Check your filter right now. Pull it out and hold it up to a light. If you can’t see light through it, it’s overdue for replacement. A standard 1-inch filter should be changed every 30 to 90 days depending on your household - more often if you have pets or allergies. You’ll want to keep a supply of filters on hand so you never have to let the system run dirty. Grab a pack of Filtrete 1500 MPR filters in your size - they offer a good balance of filtration and airflow without starving the system.
Once you swap the filter, if the evaporator coil was iced over, turn the system to “fan only” for an hour before switching back to cool. Running the fan without cooling allows the coil to thaw. Running it in cooling mode with ice on the coil can damage the compressor.
Check the Condenser Unit Outside
The outdoor unit - the big metal box with the fan on top - is called the condenser. It’s responsible for dumping the heat your system pulled from inside your home into the outside air. If it can’t do that job efficiently, your house stays hot.
Walk outside and look at your condenser. Common problems include:
- Dirty condenser coils. Grass clippings, cottonwood fluff, dirt, and debris accumulate on the fins around the outside of the unit. This acts like insulation and prevents heat from escaping. You can clean the coils yourself with a garden hose - spray from the inside out after turning the system off at the disconnect box (the gray box mounted on the wall near the unit). For stubborn buildup, an AC coil cleaner spray works well and rinses clean.
- Vegetation blocking airflow. The condenser needs at least 2 feet of clearance on all sides and ideally 5 feet of open space above. Trim back shrubs, tall grass, or anything growing close to the unit.
- The condenser fan isn’t spinning. Turn the system on and watch the fan. It should be spinning. If it’s not, the capacitor may have failed - a $15 to $40 part that a confident DIYer can replace, though it stores lethal voltage and must be handled carefully (discharge before touching).
According to the U.S. Department of Energy, keeping the condenser clean and unobstructed is one of the highest-impact maintenance tasks for cooling efficiency.
Thermostat and Refrigerant Problems
If the filter is clean and the condenser looks good, the next step is checking the thermostat and system pressures.
Thermostat issues:
- Make sure the thermostat is set to “Cool” and not “Heat” or “Fan Only” - sounds obvious, but it happens.
- Check that the temperature setpoint is actually lower than the current room temperature. Some smart thermostats show schedules that can override your manual setting.
- If your thermostat is battery-powered, low batteries can cause erratic behavior. Replace them.
- If you have a smart thermostat and it’s more than a few feet from the nearest supply vent, a nearby lamp or TV might be warming the sensor and making the thermostat think the room is hotter or cooler than it is. Relocate nearby heat sources if possible.
Low refrigerant: If you’ve ruled out airflow and thermostat issues and the system still can’t keep up, low refrigerant is a real possibility. Signs include:
- Ice forming on the refrigerant line (the insulated copper pipe going into the house)
- The indoor air handler blows but the air feels only mildly cool, not cold
- The system runs constantly without ever reaching setpoint
Refrigerant doesn’t “run out” normally - it circulates in a closed loop. If it’s low, there’s a leak. A technician will need to find and fix the leak before adding refrigerant. The EPA has guidance on refrigerant regulations homeowners should understand before calling a service company.
Ductwork, Airflow, and Sizing Problems
Sometimes the AC unit is working fine but the cool air isn’t getting where it needs to go.
Leaky or disconnected ducts: Supply ducts carry cooled air to your rooms. If a duct has come loose in the attic or crawlspace, you’re paying to cool your attic instead of your living room. This is more common than people think, especially in older homes. Check accessible ducts in the attic or crawlspace for obvious gaps and seal them with foil HVAC tape - not regular duct tape, which fails in heat.
Closed or blocked vents: Walk through the house and make sure every supply and return vent is open. Furniture pushed against vents, closed dampers, or vents that have been accidentally closed can starve rooms of cool air.
Undersized system: If the AC runs constantly and the house still doesn’t reach setpoint on a hot day, the system may simply be too small for the square footage or the home’s heat load. This becomes more common when additions are made to a house without upgrading the HVAC. This requires a Manual J calculation from a contractor to diagnose properly - it’s not something you can fix yourself, but knowing the cause helps you make a smarter decision about repair vs. replacement.
Attic insulation and air sealing: If your attic has inadequate insulation or lots of air leaks, heat bleeds through the ceiling and overwhelms the AC. According to ENERGY STAR, proper attic insulation is one of the most cost-effective home improvements for comfort and energy bills.
Check our guide on how to improve home air quality with your HVAC system for related tips on optimizing your system’s performance throughout the house.
Complete Troubleshooting Guide
Common Mistakes Homeowners Make When Troubleshooting
- Closing vents in unused rooms. This doesn’t save energy - it actually increases static pressure in the ductwork and can damage the blower motor over time. Keep vents open throughout the house.
- Ignoring ice on refrigerant lines. Ice on the line is a symptom, not a problem you solve by chipping it off. Turn the system to fan-only, find the cause (usually a dirty filter or low refrigerant), and fix that.
- Adding refrigerant without fixing the leak. This is throwing money away. The refrigerant will leak out again, and you’re also releasing a greenhouse gas into the atmosphere.
- Expecting a 15-year-old system to keep up on a 100-degree day. Older systems lose efficiency over time. If your system is struggling only on extreme heat days, that may be within normal limits for its age and size.
- Skipping the condenser cleaning. Many homeowners never touch the outdoor unit. A can of coil cleaner once a year can make a noticeable difference in cooling capacity.
For a broader look at your system’s long-term health, see our guide on how to extend the life of your HVAC system.
How to Run a Systematic Diagnosis: A Step-by-Step Process
Rather than guessing, work through these steps in order. Most problems are found within the first three steps.
Step 1: Check the air filter (5 minutes) Pull the filter. If it’s gray and clogged, replace it immediately. This single step resolves the problem in a large percentage of cases. After replacing the filter, wait 30 minutes for the system to stabilize before deciding whether the problem is solved.
Step 2: Inspect the evaporator coil access panel (5 minutes) The air handler (the indoor unit) has an access panel. Open it carefully. Look at the evaporator coil - it should look like a silver-colored finned radiator. If it’s coated in ice, you have a freeze-up. Turn the system to fan-only and let it thaw for an hour or two. A frozen coil is almost always caused by restricted airflow (dirty filter) or low refrigerant.
Step 3: Check the outdoor condenser (10 minutes) Walk outside with the system running. The condenser fan (on top of the unit) should be spinning. The unit should be warm to the touch on the top and sides - that’s heat being expelled. If it’s cool, the compressor may not be running. Look at the coil fins around the outside - if they’re clogged with debris, clean them with a hose.
Step 4: Check thermostat settings and calibration (5 minutes) Make sure the mode is set to Cool and the fan is on Auto. Verify the setpoint. If you have a digital thermostat, compare its reading to an inexpensive standalone thermometer placed near the thermostat - if there’s more than a 2-degree discrepancy, the thermostat sensor may be off.
Step 5: Walk the ductwork and vents (15 minutes) Open every vent in the house. Check for furniture blocking returns. If you have attic access, look at accessible ducts for obvious gaps or disconnections. Hold your hand near supply registers while the system is running - you should feel a strong, cold airflow. Weak flow in certain rooms indicates a duct problem or imbalance.
Step 6: Check the refrigerant lines (3 minutes) Find where the insulated copper pipe enters the house. Run your hand along the insulation. The large pipe (suction line) should be cold, possibly with light condensation on a humid day. If it has ice on it, stop and call a technician. If it’s room temperature, refrigerant may be critically low.
Step 7: Check electrical basics (5 minutes) Look at the circuit breaker panel. Is the AC breaker in the full ON position or has it tripped to the middle? A tripped breaker will cut power to the system. Reset it once. If it trips again, do not reset it again - repeated tripping indicates an electrical fault that a technician must diagnose.
This systematic approach takes less than an hour and will identify the vast majority of AC problems homeowners can fix themselves.
What Your Energy Bill Can Tell You
An AC that’s struggling to cool often shows up in your energy bill before you notice comfort issues. If your electricity usage this summer is significantly higher than last summer (accounting for similar temperatures), your system may be working much harder than it should.
A system with a dirty condenser or low refrigerant can lose 15 to 25 percent of its cooling efficiency, which translates directly to higher bills. According to the U.S. Department of Energy, regular maintenance - including coil cleaning and filter changes - can restore lost efficiency and keep bills in check.
If you’re comparing year-over-year usage, pull last year’s bills from your utility’s website or app. Most utilities offer a usage history tool. A meaningful spike in summer usage without a corresponding spike in outdoor temperatures is a red flag worth investigating.
When to Call a Pro
Not every AC problem is DIY territory. Call a licensed HVAC technician when:
- You suspect a refrigerant leak (ice on lines, hissing, system runs constantly without cooling)
- The capacitor or contactor has failed and you’re not comfortable around high-voltage components
- The compressor is making loud grinding or rattling noises
- The system is tripping the breaker repeatedly
- You’ve worked through every step above and still can’t find the problem
A diagnostic service call typically runs $75 to $150 before any parts or repairs. Ask for an itemized quote before authorizing any work. A good technician will show you exactly what they found - if they’re vague or push immediately for a replacement without explaining what failed and why, get a second opinion.
FAQ
Why is my AC running but not blowing cold air? The most common causes are a dirty air filter restricting airflow, a frozen evaporator coil, or low refrigerant. Start by checking and replacing the filter, then thaw the coil by running the system in fan-only mode. If the problem persists, have a technician check refrigerant levels.
Can I recharge my own AC with refrigerant? No - not legally or safely. R-410A (the most common modern refrigerant) requires EPA 608 certification to purchase and handle. Consumer “recharge” kits are designed for car AC systems, not central air systems. If your system is low on refrigerant, there is a leak that must be repaired first.
How often should I clean my condenser unit? Once a year at the start of cooling season is the minimum. If you have cottonwood trees nearby or significant pollen, clean it at the start and middle of the season. Turn the system off at the disconnect box first, then spray the coils from inside out with a hose.
My AC runs all day and the house is still warm - is my system too small? Possibly, but rule out other causes first: dirty filter, dirty condenser, duct leaks, and inadequate insulation. If everything checks out and the system still can’t keep up on a 95-degree day, a load calculation (Manual J) from a contractor will tell you definitively whether the system is undersized.
What’s the ideal temperature differential for central AC? A properly functioning central AC system should produce air at the supply registers that is 15 to 22 degrees Fahrenheit cooler than the return air temperature. If your return air is 75°F and supply air is above 60°F, the system isn’t performing well.
Have questions about your HVAC system? Drop them in the comments or use our contact page.