HVAC Zoning Systems for Uneven Cooling and Heating Without System Replacement
This post contains affiliate links. As an Amazon Associate, I earn from qualifying purchases at no extra cost to you.
You’ve probably noticed it: one room feels like a sauna while another sits ice cold. Your upstairs bedrooms refuse to cool below 76°F in summer, but your basement gets chilly by evening. Replacing an entire HVAC system isn’t practical or necessary. The solution is HVAC zoning - a retrofit approach that adds control over where conditioned air flows throughout your home.
By installing motorized dampers in your ductwork and pairing them with zone control panels and thermostats, you can independently manage heating and cooling in different areas. This means your home office stays at 72°F while the living room holds 70°F, and your upstairs never overheats again.
Zoning works with your existing equipment - no replacement needed. You add precision to what you already have. This guide walks you through how zoning functions, what components you’ll need, installation realities, costs, and common mistakes to avoid.
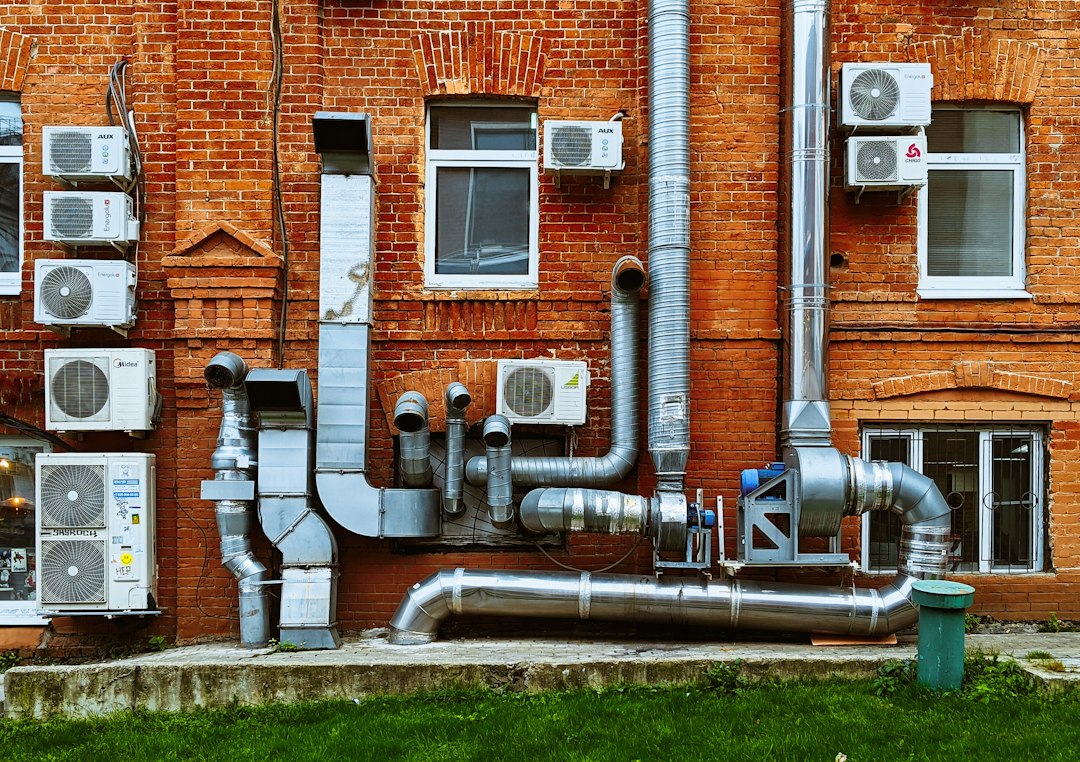
Photo by Vadim Babenko on Unsplash
How HVAC Zoning Works
HVAC zoning divides your home into distinct thermal zones, each controlled independently. Motorized dampers in your ducts act as valves, opening or closing to direct airflow where it’s needed. When your bedroom zone calls for cooling, a damper opens that branch of ductwork. When another zone reaches its target temperature, its damper closes partially or fully, redirecting air elsewhere.
A central control panel manages which dampers open or close based on signals from individual thermostats in each zone. Your furnace or air conditioner already produces enough airflow for targeted delivery. A single HVAC system can comfortably manage two to four zones without modification.
Zoning doesn’t require separate ducts for each zone - it uses what you have. Main supply lines branch into zone-specific runs, each with a damper and thermostat sensor. Return air typically comes from one central point, though some setups use multiple return paths to ensure balanced pressure.
A critical requirement: your system must have adequate supply capacity. If your current setup barely cools or heats your whole house, zoning will make the problem worse. Ensure your existing system isn’t already at its limits before committing. Checking airflow to every room in your existing setup is essential baseline knowledge - see our related guide for details.
HVAC Zoning System Components
Every zoning installation has four essential parts: dampers, a control panel, thermostats or sensors, and wiring.
Motorized dampers are the workhorses. These 24-volt devices install inside ducts and respond to electrical signals. Most are single-blade designs positioned anywhere from fully open to fully closed. Quality matters - cheap dampers leak when closed, forcing your system to work harder. The Suncourt 4-Inch NC 24V Motorized Damper, Plug-in Transformer (ZC204) includes a plug-in transformer for installation.
Zone control panels interpret signals from your thermostats and command dampers. Entry-level panels handle a small number of zones; advanced panels support additional zones and can integrate with smart home systems. The SINGLE-STAGE 2-ZONE CONTROL PA is an entry-level choice for splitting homes into two comfort areas.
Thermostats or sensors feed information to your control panel. Wired thermostats mount on walls in each zone; wireless sensors use batteries. Smart thermostats like the Honeywell Home T9 WiFi Smart Thermostat with 1 Smart Room Sensor, Touchscreen Display, White offer WiFi connectivity, with a smart room sensor for monitoring conditions in locations beyond the thermostat’s wall.
Wiring and labor complete the package. Most systems use low-voltage 24V wiring from the control panel to each damper. If your system is complex (heat pump with auxiliary heat), professional installation is recommended.
Installation and Compatibility Reality Check
Adding zones sounds simple until you examine your existing system. Some setups are incompatible with zoning and retrofitting invites problems.
Your furnace or air conditioner must tolerate restricted airflow. When dampers close, pressure builds. If your system lacks a bypass duct to relieve pressure, your blower overworks and efficiency drops. Many older furnaces (pre-2000) and budget units lack this protection. Check your equipment nameplate or consult ASHRAE ductwork guidelines before purchasing zoning components.
System pressure must balance. With all dampers open, your ductwork handles one airflow rate. With some dampers partially closed, pressure shifts. Poor ductwork design - undersized runs, excessive bends, dead-end branches - amplifies this effect. The best zoning systems work in well-designed duct networks. If hot and cold spots stem from poor ductwork, duct remediation may be needed first. The U.S. Department of Energy offers resources on duct sealing and optimization that apply before zoning retrofit.
Thermostat conflicts require care. Your original thermostat controls when your furnace or air conditioner runs. A zoning system adds control over where air goes. Professional installations usually replace the original thermostat with a zone-averaging strategy: the control panel monitors all zone sensors and initiates heating or cooling when any zone requests it, then closes dampers to manage distribution.
Heat pumps need special attention. Heat pumps depend on consistent airflow across their outdoor coil. Excessive zoning damper closure can reduce outdoor coil airflow, causing freeze-up and triggering defrost cycles more often. Most heat pump zoning installations restrict zones to two or three, never exceeding 50% airflow reduction.
Professional assessment is worthwhile if unsure. A technician can perform a blower door test, duct pressure assessment, and equipment analysis for $150–$250 and tell you definitively if your system is a good zoning candidate.
Zoning System Costs and Payback Timeline
A complete 2-zone retrofit involves costs for parts and labor whether you DIY or hire a professional. A 3-zone system typically costs more.
Parts breakdown (2-zone DIY):
- Two motorized dampers
- Zone control panel
- Wired thermostats or sensors
- Wiring, mounting hardware, thermostat bypass
- Ductwork access and patching materials
Professional labor: $800–$2,000 depending on ductwork accessibility, wiring complexity, and regional rates.
Energy savings: Realistic range is 8–15% annually if your home has significant temperature imbalance (20°F+ difference between zones). Homes with minor comfort issues see 2–5% savings. Your actual return depends on how much your system oversized certain zones to compensate for neglected ones.
Payback timeline: 5–12 years for most homes. In very uneven homes with high energy bills, payback can occur in 3–4 years. In mild climates with modest comfort complaints, payback extends to 15+ years.
Zoning makes sense if you have significant temperature discrepancies (more than 5°F when setpoint is the same), operate your HVAC heavily, plan to stay long enough to benefit, and have equipment in good working order. Zoning is less appealing if your furnace or air conditioner is in its terminal years - upgrading to a new, efficient unit might deliver better returns.
Zoning Versus Other Approaches
HVAC zoning isn’t the only way to address temperature imbalance.
Ductwork remediation costs $500–$2,000 and includes sealing leaks, adding insulation, or realigning dampers. If ducts are poorly sealed or undersized in specific branches, this may solve 40–60% of your comfort problem at lower cost than zoning. Most homes benefit from duct sealing regardless of zoning choices.
Single-room mini splits add independent cooling and heating without central ductwork. If you need to fix one consistently uncomfortable room, a mini split is simpler than zoning. However, they create multiple outdoor units, add maintenance complexity, and don’t integrate seamlessly with existing equipment.
Upgraded insulation and air sealing ($2,000–$5,000 for whole-home weatherization) improve baseline comfort by reducing heat loss and gain. Almost always worth doing first before zoning.
Whole-system replacement ($5,000–$15,000) makes sense if your current equipment is 15+ years old or catastrophically undersized. Otherwise, it’s premature.
The practical hierarchy: first seal and insulate, then add zoning if imbalance persists, and only upgrade equipment if it’s aged out.
How to Add Dampers and Zone Control to Your Existing HVAC System
Here’s a step-by-step process for planning and installing a zoning retrofit:
-
Audit your ductwork and temperature patterns. Spend a week recording temperatures in each room at the same thermostat setpoint. Identify which zones need independent control - upstairs/downstairs split is most common. Take photos and rough measurements of your main supply ducts, return paths, and plenum (the chamber connecting your furnace or air handler to ducts). This maps your zoning strategy.
-
Confirm system compatibility. Locate your furnace or air handler nameplate and note the model, blower capacity (CFM), and age. Check whether dampers are present; many systems have factory-installed dampers or check valves. Call your HVAC manufacturer’s technical line or consult the system manual to verify bypass damper requirements and heat pump limitations. If uncertain, hire a technician for a $150–$250 assessment.
-
Design your zones and damper locations. Sketch your ductwork and identify where to install motorized dampers. Each zone needs a damper on its supply branch before the duct splits into individual room runs. Avoid installing dampers immediately downstream of the main plenum - most units require 3–6 inches of straight duct upstream and downstream for proper operation. Plan for electrical access near each damper for the 24V transformer connection.
-
Gather parts and tools. Order motorized dampers (one per zone, plus spares), a zone control panel compatible with your thermostat setup, thermostats or sensors, 24V wiring, duct tape or mastic sealant, mounting brackets, and a bypass damper if needed. Rent or borrow: a reciprocating saw, drill, level, and multimeter for wiring troubleshooting.
-
Shut off your HVAC system before any ductwork cuts. This is non-negotiable for safety. Turn off the furnace and air conditioner at the breaker panel. Wait 15 minutes for airflow to stop completely.
-
Cut, fit, and secure each damper. Follow the damper manufacturer’s instructions exactly. Most involve cutting a hole slightly larger than the damper body, sliding the damper into place, and fastening with brackets or bands. Seal any gaps with mastic or foil-backed tape; leakage defeats their purpose.
-
Run 24V wiring from the control panel to each damper. Use labeled, color-coded wire and route it away from refrigerant lines and electrical wiring. Secure wiring with clips every 16 inches. Terminate at the damper’s terminal block, matching wire colors to the control panel instructions.
-
Install zone thermostats and configure the control panel. Mount thermostats on interior walls at least 5 feet from doors, windows, and heat-generating appliances. Program the panel to recognize each zone and define setpoints. If integrating with a smart thermostat, ensure the control panel supports the protocol and update firmware.
-
Test damper operation and airflow. Restore power to your system. Switch to heat or cool mode and verify dampers respond to setpoint changes. Use a hand-held anemometer ($30–$50) to check airflow velocity at vents in each zone - should be similar across zones when dampers are balanced.
-
Monitor and fine-tune thermostat scheduling. Run your system for a full heating and cooling cycle, then adjust schedules, setpoints, and damper logic as needed. Most systems need 2–4 weeks of tweaking before settling into optimal performance.
This process typically takes a weekend for a confident DIYer. Professional installers complete it in 4–6 hours.
Common HVAC Zoning Mistakes and How to Avoid Them
The most frequent zoning failures stem from insufficient planning, improper damper sizing, and ignoring system pressure dynamics.
Undersizing or oversizing dampers is the top mistake. A damper too small restricts airflow even when fully open, starving that zone and overloading others. A damper too large leaks when closed, preventing proper air redirection. Damper size must match duct diameter and airflow volume. Consult your duct blueprint and the damper manufacturer’s sizing chart. When in doubt, round up - a slightly oversized damper is more forgiving.
Installing dampers in wrong locations causes rapid pressure buildup and cycling. Never install a damper immediately after your furnace or air handler plenum; you’ll create a bottleneck that strangles the entire system. Place dampers on individual zone branches, at least 12 inches downstream of any splits. Avoid installing dampers in ducts that share return air.
Forgetting a bypass damper or relief is dangerous. When all zone dampers are nearly closed, pressure spikes, your blower overheats, and your system can shut down on a high-temperature limit. A bypass damper opens automatically when pressure exceeds a threshold, venting excess air back to the return plenum. Verify this exists or install one. Cost is $100–$200 and effort is minimal, but omitting it courts equipment failure.
Thermal short-cycling is common with single-stage equipment. Multi-stage equipment and continuous circulation (blower on “fan” mode) reduce this. For single-stage systems, configure your control panel to avoid rapid damper switching and use a slight temperature deadband to prevent short-cycling.
Ignoring return air balance leads to stale spots. If all return-air intake is in one zone, other zones can pressurize and trap stale air. Add return-air ducts or grilles to distant zones, or install a motorized return-air damper that opens when supply dampers are closed elsewhere.
Disabling original thermostat controls without replacement creates a control vacuum. Your furnace still needs a signal to start and stop. All professional installations replace the original thermostat with a master/slave arrangement where the zone control panel monitors all sensors and governs the furnace’s on/off cycle.
Safety note: Some HVAC systems use gas furnaces, which produce carbon monoxide. When sealing ducts or adding dampers, never fully restrict return-air flow - this causes backdrafting and dangerous CO accumulation. Always ensure your furnace’s return-air path remains open and unobstructed, and install battery-powered CO detectors in bedrooms and living areas. If you notice sooting around the furnace, unusual smells, or headaches during heating season, stop immediately and call a professional HVAC technician. Proper zoning requires balancing comfort with safety.
HVAC Zoning FAQ
Q: Will adding zones void my HVAC warranty?
A: Most manufacturer warranties don’t explicitly forbid zoning, but improper installation can void coverage. Using non-OEM components or modifying your equipment in undocumented ways creates liability. Many major HVAC manufacturers support zoning when installed per their guidelines. Buy compatible components and keep documentation. If warranty protection matters, contact your manufacturer directly before purchasing.
Q: How many zones can I safely add to my existing system?
A: Most single-stage systems handle a limited number of zones reliably. Multi-stage equipment supports more zones. Beyond a certain zone count, pressure dynamics worsen and your system works harder. Heat pumps are more sensitive to zoning - keep their zone count low. Professional assessment is wise; adding too many zones forces your equipment to work at an efficiency penalty and risks short-cycling.
Q: Can I add zoning to a heat pump?
A: Yes, but carefully. Heat pumps depend on steady return-air flow across their outdoor coil. Aggressive zoning damper closure can starve the coil and trigger freeze-up or defrost cycles. Most heat pump zoning installations restrict dampers to 50% closure maximum and use only 2 zones. Consult a heat pump-specializing technician before committing to zoning.
Q: Do I need smart thermostats for zoning to work?
A: No. Basic programmable thermostats work fine with zoning control panels. Smart thermostats like the Honeywell Home T9 add convenience and WiFi connectivity but are optional. If budget is tight, retrofit zoning with basic wall-mounted sensors and upgrade later. The zone control panel doesn’t care whether sensors are smart or simple.
Q: What’s the difference between dampers and smart vents?
A: Dampers are motorized shut-off valves built into your main supply ducts; they can fully close a zone’s airflow. Smart vents are smaller, modulating devices fitting into individual room vents; they partially restrict airflow but rarely fully close. Dampers at the branch level are more reliable for whole-zone control and cause fewer pressure issues, but smart vents are cheaper ($20–$40 each) and don’t require ductwork modification.
Q: How long does a zoning system typically last?
A: Motorized dampers last 15–25 years with occasional maintenance. Control panels and thermostats last 10–20 years. Wiring is good for your home’s life. Most zoning systems outlive their payback period and continue delivering comfort for decades. Maintenance is minimal: vacuum damper vents annually, replace thermostat batteries if wireless, and inspect wiring for corrosion every 3–5 years.
Conclusion
HVAC zoning sidesteps system replacement while addressing temperature imbalance by adding motorized dampers, a zone control panel, and multiple thermostats. You regain precision and deliver the right temperature to the right place at the right time. The investment—$1,200 to $4,500—typically pays back over 5–12 years through reduced energy waste and improved comfort.
Before starting, verify your existing system is a good zoning candidate by having a professional assess pressure balance, bypass capacity, and compatibility. Map your ductwork and zones honestly; zoning works best in well-designed networks. Install dampers carefully, avoid common mistakes, and test thoroughly before declaring success.
For most homes with functional HVAC equipment and persistent hot and cold spots, zoning is the pragmatic, cost-effective answer that preserves your investment while solving your comfort problem. If this guide has clarified zoning for you, bookmark it for reference during installation or share it with your HVAC technician to align expectations.