Thermostat Placement Mistakes That Waste Energy and How to Fix Them
This post contains affiliate links. As an Amazon Associate, I earn from qualifying purchases at no extra cost to you.
Your thermostat is the command center of your entire heating and cooling system, but most homeowners position it like it’s decorative. A thermostat mounted in the wrong spot reads the wrong air temperature, tells your HVAC system to run longer than necessary, and can cost you hundreds of dollars per year in wasted energy. The problem is sneaky because your system still works - it just works inefficiently, cycling on and off at the wrong times based on false temperature signals.
The good news: thermostat placement is something you can actually fix without calling an HVAC contractor. Understanding where thermostats should go and why teaches you one of the most cost-effective ways to control your heating and cooling bills. This guide walks through six critical placement mistakes homeowners make, the energy waste they cause, and how to fix them.
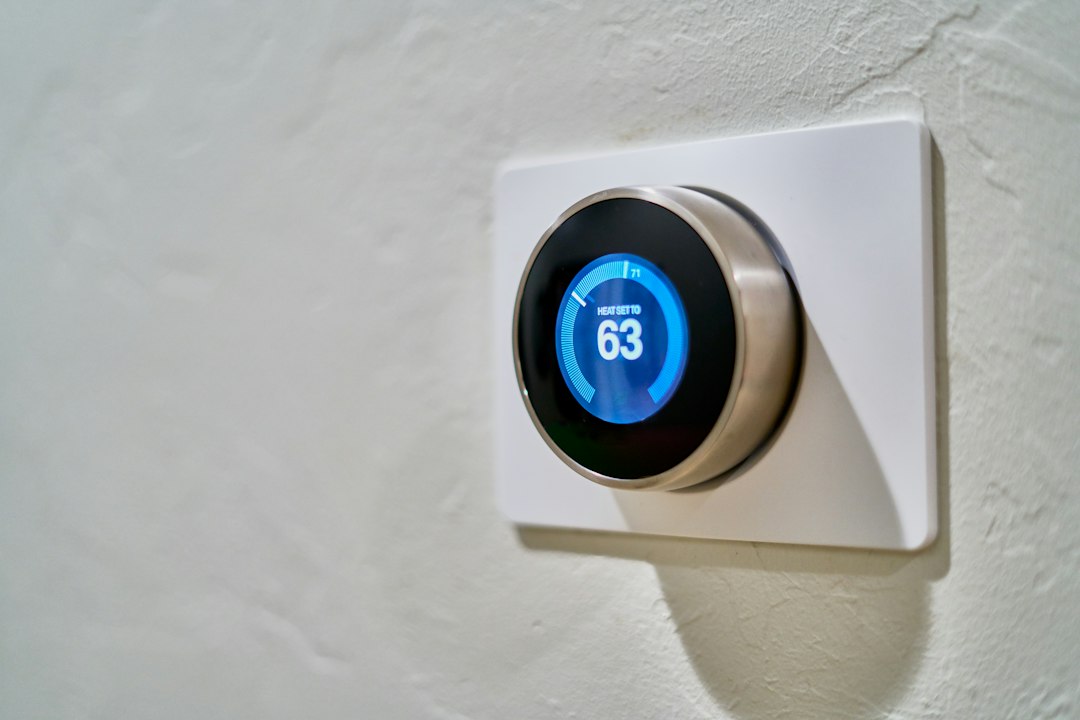
Photo by Dan LeFebvre on Unsplash
Why Thermostat Placement Matters for Energy Efficiency
Your thermostat doesn’t measure the temperature of your entire home. It measures the temperature of the air immediately around itself. If that air is warmer or cooler than the rest of your house, the thermostat makes decisions based on a lie, and your HVAC system responds by heating or cooling longer than it should. A thermostat in direct sunlight might sense false warmth and skip cooling cycles, leaving the rest of your home uncomfortably hot. A thermostat near a cold exterior wall might trigger heating cycles that over-warm the house.
According to the U.S. Department of Energy and Energy Information Administration, heating and cooling account for roughly 40-50% of residential energy consumption. Even small inefficiencies from poor thermostat placement multiply across heating and cooling seasons. A thermostat that cycles just 10% more often than necessary can add hundreds of dollars per year to your utility bills. The ASHRAE (American Society of Heating, Refrigerating and Air-Conditioning Engineers) standards specify that thermostats should be located in spaces representative of occupied zones to avoid temperature drift and unnecessary cycling.
The fix starts with understanding where thermostats actually belong and what kinds of locations create measurement errors.
Six Most Common Thermostat Placement Mistakes
Mistake 1: Mounting on an exterior wall. An outside wall is the worst possible location for a thermostat. In winter, cold air radiates inward through the wall, fooling the thermostat into thinking the house is colder than it is. Your furnace runs longer and harder than necessary. In summer, the opposite happens: solar heat warms the wall from outside, the thermostat over-senses warmth, and the air conditioner runs more often. You pay for both over-heating and over-cooling because the placement itself creates temperature swings.
Mistake 2: Placing it in direct sunlight. Even thermostats on interior walls suffer if sunlight hits them during parts of the day. The sensor inside reads the radiant heat from the window or sun exposure, not the actual room air temperature. Morning sun in the east, afternoon sun in the west, or south-facing windows create false temperature signals that vary by time of day and season.
Mistake 3: Mounting directly above or beside return air vents. Return air vents pull air from your rooms and send it back to the furnace or air handler. A thermostat mounted directly above a return vent reads the average of all the air returning to the system, not the temperature where people actually live. This creates a measurement loop that skews readings artificially hot in summer (when the system is running and pulling cooled air back through the vent) and artificially cool in winter, causing short-cycling and inefficiency.
Mistake 4: Placing it in low-traffic areas with poor airflow. A thermostat in a closet, corner, or enclosed space doesn’t sample representative room air. Dead-air zones don’t reflect the temperature of the main living spaces where you spend time, so the thermostat underestimates or overestimates what’s actually happening in occupied areas.
Mistake 5: Mounting too high or too low. Warm air rises and cold air sinks. A thermostat mounted near the ceiling reads warmer air in winter and may not trigger heating when lower living spaces are cold. A thermostat near the floor reads cooler air in summer and might trigger more cooling than necessary. The ideal mounting height is 52 to 60 inches from the floor, roughly at eye level on an average adult.
Mistake 6: Installing next to heat-generating appliances or drafts. A thermostat near a kitchen, bathroom, living space with fireplaces, TV equipment, desk lamps, or cooking appliances reads the thermal activity of those devices, not the home’s actual climate. Similarly, placement near doors, windows, or air leaks subjects it to drafts and exterior air that don’t represent typical room conditions.
How to Find Your Thermostat’s Ideal Location: A Step-by-Step Process
Use this systematic process to evaluate whether your current thermostat location works or needs to move.
-
Check for direct sunlight and heat sources during peak hours. Walk through your central hallway, stairwell, or main living area (whichever is most representative of your home’s average temperature) and note which walls receive sun at different times of day. Identify appliances, fireplaces, heat registers, and air returns. A good thermostat location avoids all of these. The ideal spot should be in shade or indirect light throughout the day, away from heat-producing equipment and activity zones.
-
Measure the distance from doors and windows. The ideal thermostat sits at least 3 feet away from any exterior door or window. This buffer zone prevents drafts and exterior temperature radiation from skewing readings. If your home is very small or has an open floor plan, prioritize distance from the most-used exterior entry point or the window with the most sun exposure.
-
Take temperature readings at the proposed new location throughout the day. If you’re considering moving your thermostat, use a portable digital thermometer or a smartphone temperature app at the proposed new location. Record readings at different times: early morning, mid-day, late afternoon, and evening. Compare those readings to the temperature your current thermostat displays at the same times. If readings vary significantly between locations, the current location is distorting your system’s operation. If your test spot shows stable, consistent readings, it’s a better location.
-
Confirm adequate airflow without direct ductwork interference. Place your hand near the test location. You should feel gentle air circulation, but not a strong draft from a supply register or return vent. A wall with consistent background air movement (not stagnant, not jet-like) indicates a good spot for sampling true home temperature. Avoid closets, corners blocked by furniture, or areas with no air circulation.
-
Verify the location is central to your living spaces and main zones. The best thermostat location is in a central hallway, main living area, or first-floor landing of a two-story home. It should be reasonably equidistant from the areas you occupy most, not biased toward one room or thermal zone. This ensures the thermostat reads an average temperature representative of your actual comfort zones.
-
Plan the relocation and assess wiring requirements. If the current location fails these checks, plan to relocate the unit. Thermostat wiring typically runs through walls to the furnace or air handler in low-voltage wire (18-gauge thermostat cable). If the new location is within 15-20 feet of the current position along an existing path, an experienced DIYer can run new wire. If relocation requires running wire through walls, across multiple rooms, or over longer distances, hire a professional. Mistakes in thermostat wiring can damage control boards or create intermittent system failures. Additionally, if your furnace has a pilot light or uses natural gas, a professional HVAC technician can ensure the system is tested for proper operation after any wiring changes and can check gas connections for safety.
Smart Thermostats That Solve Thermostat Placement Problems
If your home has significant temperature stratification, multiple uneven zones, or a floor plan where no single spot perfectly represents the whole house, ENERGY STAR-certified smart thermostats with remote temperature sensors offer a modern solution. These devices let you add sensors in multiple rooms and average their readings, making placement less critical to overall efficiency.
The Google Nest Learning Thermostat (4th gen) + Nest Temperature Sensor (2nd gen) - Silver bundles a main thermostat with a wireless temperature sensor. The sensor lets you place the main thermostat in a less-than-ideal but convenient location and position the sensor in a representative room, so the system can factor in conditions from multiple locations. This is especially useful if your main thermostat must live in a hallway but you want the system to prioritize comfort in a primary bedroom or living room during evening hours.
The ecobee Smart Thermostat Premium - WiFi, Siri & Alexa Built-In, Smart Sensor includes a Smart Sensor. This is a strong option if you have a large home or very variable temperatures between floors and rooms. You can place the sensor in a room that matters most to your comfort, helping the thermostat account for conditions beyond the main unit’s location and reducing the penalty of a less-than-ideal thermostat placement.
For Nest thermostat owners wanting extra room monitoring without replacing the main unit, the Google Nest Temperature Sensor (2nd Gen) - Room Comfort Sensor with Scheduling is a standalone wireless sensor that works with the Nest Learning Thermostat (3rd and 4th gen) and Nest Thermostat E. Adding a sensor can provide room-specific comfort control with scheduling, effectively compensating for placement limitations without requiring a professional thermostat relocation.
Common Thermostat Placement Mistakes and Quick Fixes
The most frustrating thermostat placement errors are the ones that seem minor but compound over time. Here’s how to recognize them and fix them fast.
Sunlight problem: If your thermostat’s location gets direct sun during certain hours, install a small shade or reflector over the thermostat’s face. Avoid thick covers that completely block airflow; use a thin solar shade or piece of white foam board mounted an inch away from the device. Test to ensure the device still receives adequate air circulation for accurate readings. Alternatively, and preferably, relocate the thermostat out of the sun’s path.
High placement near the ceiling: If your thermostat is mounted too high, it over-reads warmth in winter because heat naturally rises. The simple fix: lower it to 52-60 inches from the floor. If you cannot relocate the unit due to existing wiring constraints, a temporary workaround is to set your thermostat setpoint 1-2 degrees higher than your target comfort temperature in winter, which compensates for the false warmth reading. This is a temporary patch, not a permanent fix - relocation is always the better solution.
Basement return vent placement: If your main thermostat is in a basement furnace room next to a return air vent, it’s sensing system air (the mix of all air coming back from occupied zones), not representative home air. This causes short-cycling and inefficiency. Solution: move the thermostat upstairs to a central location on the main floor, or add a temperature sensor upstairs to your smart thermostat to override the basement unit’s readings if you can’t relocate the main device.
Drafty door or window: If the thermostat is near an exterior door or window and you feel cold drafts around it, apply weatherstripping to the door, seal gaps around the window frame, or move the thermostat. These solutions are listed in order of effort. Start with weatherstripping or caulk if you’re renting or avoiding major work.
Multiple thermostats creating conflict: Some older homes have multiple thermostats (one per zone). If both are positioned poorly, your system cannot coordinate properly and will cycle inefficiently. Consolidate by repositioning at least one thermostat to a central location and using the other as a secondary override, or replace the system with a single smart thermostat and remote sensors.
Heat pump defrost mode interference: If you have a heat pump, a poorly placed thermostat might misinterpret the defrost cycle as a warmth signal. During defrost, the heat pump briefly raises indoor temperature while clearing outdoor ice. A badly placed thermostat might think the house is warm and reduce heating when the pump is actually just defrosting its outdoor coil. Modern heat pumps and smart thermostats handle this internally, but older units can struggle. Check your system manual or call a technician if you notice heating cycles stopping too often during winter.
FAQ
Q: Can I move my thermostat myself, or do I need to hire a technician?
Relocating a thermostat is possible for handy homeowners if the new location is within 15-20 feet of the current one and you can run wire along existing paths (baseboards, conduit). You’ll need to turn off power at the breaker, disconnect the existing wiring (photograph wire positions and labels first), and run new thermostat wire to the furnace. However, mistakes in wiring or power management can damage the control board or create intermittent failures. If the move requires running wire through walls, crossing multiple rooms, or you’re uncomfortable with electrical work, hire a professional. The labor cost (typically $200-400) is worth avoiding a miswired system or damage to your equipment. For gas furnace installations, a professional can also verify safe operation and gas connections after relocation.
Q: Will a smart thermostat with remote sensors fix my placement problem without moving the unit?
Partially. A smart thermostat with remote sensors can compensate for a poor main unit location by averaging readings from multiple rooms. However, if your main thermostat is in a truly bad spot (like on an exterior wall in full sun), even averaging cannot fully correct the false signals it sends. Smart thermostats are best used to enhance an already-good placement, not to excuse a bad one. If your current thermostat location fails more than one of the six checks in this guide, moving it is still the most cost-effective long-term solution. Smart sensors are a supplement to good placement, not a replacement for it.
Q: How do I know if my current thermostat location is actually wasting energy?
The easiest test is to compare your utility bills before and after relocating the thermostat. If you move a poorly placed unit to a better spot and your heating or cooling costs drop 5-15% over the same season the following year, the move paid for itself. You can also temporarily disable automatic schedules and manually set your thermostat to one fixed temperature, then monitor how often the system cycles on and off. If it cycles excessively (every 3-5 minutes), placement or maintenance issues are likely culprits. A well-placed thermostat in a properly maintained system usually cycles every 10-20 minutes during active heating or cooling periods.
Q: What temperature setpoint should I use if I can’t move my thermostat right now?
If you’re stuck with a poorly placed thermostat temporarily, you can offset some inefficiency by adjusting setpoints strategically. If the unit reads high in winter (due to exterior wall location or sunlight), set your target 1-2 degrees lower than your preferred comfort temperature. If it reads low in summer, set it 1-2 degrees higher. This is a workaround with limited effectiveness, not a permanent solution. The real fix is still relocation when you’re able to do it. In the meantime, a smart thermostat with a remote sensor is your best stopgap option.
Conclusion
Your thermostat placement might be the single highest-ROI efficiency improvement you can make without replacing equipment or hiring major contractors. A misplaced thermostat tells your HVAC system to work harder than it needs to, wasting energy and money all year long. Moving it to a central, shaded, draft-free location costs nothing if you handle the work yourself, and the energy savings compound every season. If relocation isn’t practical or your home has multiple temperature zones, a smart thermostat with remote sensors is worth the investment. Start with an honest assessment of your current thermostat location using the step-by-step process in this post. If it fails even one placement check, plan to move it. The reduction in your utility bills will surprise you.
Bookmark this guide for reference during HVAC season - thermostat placement questions come up year-round.
Sources
- U.S. Department of Energy
- Energy Information Administration
- ASHRAE (American Society of Heating, Refrigerating and Air-Conditioning Engineers)
- ENERGY STAR