How Home Insulation Affects Your HVAC Efficiency and Energy Bills
This post contains affiliate links. As an Amazon Associate, I earn from qualifying purchases at no extra cost to you.
Your HVAC system is only as efficient as your home’s envelope allows it to be. No amount of tuning or maintenance can overcome the losses caused by poor insulation and air leaks. If your energy bills spike in summer or winter, or if your system runs constantly without keeping your home comfortable, insulation is often the culprit - not a failing furnace or air conditioner.
Most homeowners focus on HVAC equipment when they should focus on what surrounds it. Inadequate insulation forces your heating and cooling system to condition air that immediately escapes through walls, attics, and basements. The result is a vicious cycle: your system works harder, runs longer, consumes more energy, and ages faster. You pay for comfort you never actually get.
This guide explains how insulation directly impacts HVAC efficiency, where the biggest losses occur, and what you can practically do to fix them. The investments you make in insulation will return more in energy savings than many expensive HVAC upgrades.
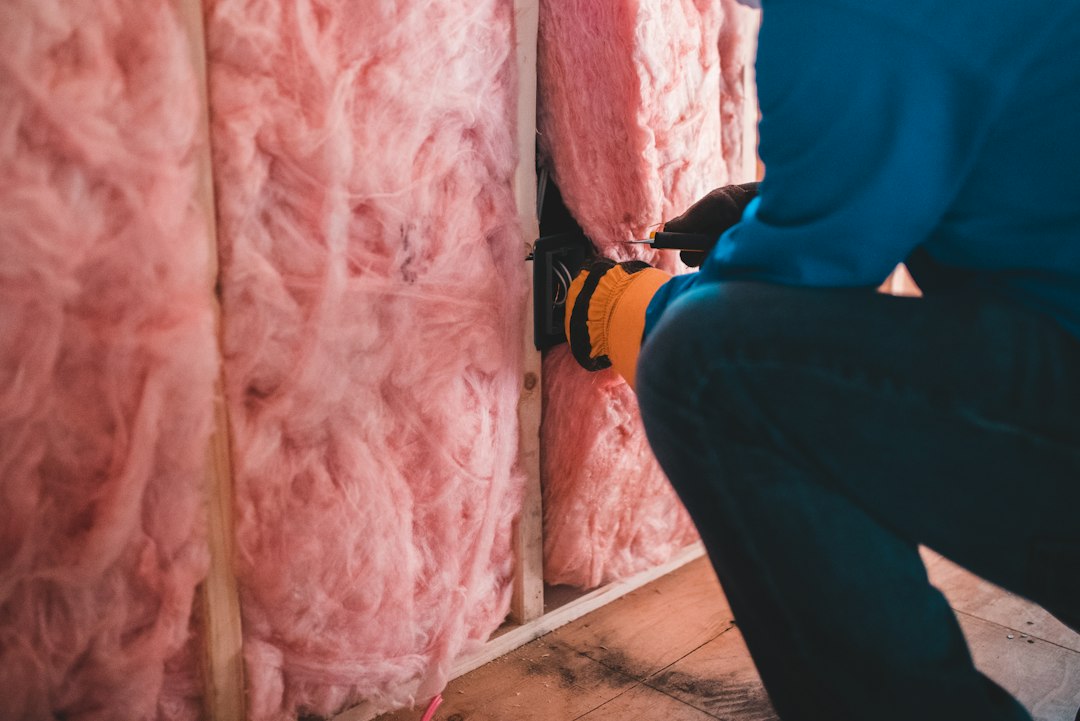
Photo by Erik Mclean on Unsplash
Understanding Insulation’s Role in HVAC Efficiency
Insulation doesn’t actively cool or heat your home - it slows the rate at which heat moves through walls, attics, basements, and crawl spaces. The better your insulation, the longer your conditioned air stays inside, and the less work your HVAC system must do to maintain your setpoint temperature.
Think of insulation as a barrier between your conditioned space and the outside environment. In summer, it prevents external heat from entering. In winter, it prevents interior warmth from escaping. Without this barrier, your HVAC system becomes a power-hungry machine constantly fighting heat transfer that proper insulation should prevent entirely.
According to the U.S. Department of Energy, air leaks and inadequate insulation account for approximately 20-30% of energy losses in a typical home. That means your HVAC system is expending a fifth to a third of its energy fighting preventable losses. Upgrading insulation from poor to adequate levels typically reduces heating and cooling energy consumption by 10-15%, sometimes more in older homes.
Your HVAC system carries efficiency ratings like SEER (Seasonal Energy Efficiency Ratio) and AFUE (Annual Fuel Utilization Efficiency), but those numbers assume a reasonably sealed and insulated envelope. Install a high-efficiency air conditioner in a home with leaky ducts and poor attic insulation, and you’ll see real-world performance significantly below rated specs. Insulation and air sealing are the multipliers that make your equipment’s rated efficiency actually matter in practice.
How Poor Insulation Drives Up Your Energy Bills
A poorly insulated home forces your HVAC system into constant struggle. Every degree your system brings a room closer to your setpoint is immediately undermined by heat transfer through weak insulation. Your thermostat signals the system to run again, and the cycle repeats without relief or efficiency gains.
The energy cost compounds quickly. A central AC unit running 8 hours daily in a well-insulated home might use 30 kWh in summer. The same unit in a poorly insulated home might run 12+ hours and consume 50+ kWh, a 67% increase. Over a 150-day cooling season, that’s 3,000 extra kilowatt-hours. At average rates of $0.14-0.16 per kWh, that’s $420-480 in additional annual cooling costs alone - every single year, until you fix the problem.
Winter losses are equally brutal. Furnaces and heat pumps in homes with inadequate basement or attic insulation run nearly continuously during cold snaps, pushing gas or electric bills to $200-300+ monthly. These aren’t system failures - they’re physics. Heat always moves from warm to cold. If you give it an easy path through poor insulation, it will take it.
Compounding the cost issue is accelerated system aging. Longer runtimes mean more wear on compressors, motors, and bearings. Systems that should last 12-15 years often fail by year 8-10 in poorly insulated homes. You’re not just paying higher energy bills; you’re replacing equipment years ahead of schedule.
Key Areas Where Insulation Leaks Waste Conditioned Air
Three zones account for roughly 85% of building envelope heat loss: the attic, the basement/crawl space, and the walls.
Attic insulation is your highest-priority target because warm air naturally rises and escapes through the roof, and summer heat radiates directly downward into living spaces. Most homes built before 2000 have attic insulation well below current recommendations. An R-38 attic (minimum for new construction in cold regions) requires 10-14 inches of material. Older homes often have 4-6 inches. The difference between R-19 (common in 1980s homes) and R-38 is roughly 30-40% reduction in attic heat transfer.
Basement and rim joist insulation is often completely absent or severely deteriorated. The rim joist - the band of framing where the basement wall meets the first-floor joists - is a thermal bridge and major air leak pathway. Uninsulated basements act as cold sinks in winter and hot, humid sinks in summer, forcing your HVAC system to work harder to condition the entire house.
Wall cavity insulation varies by age and construction method. Older homes may have none; newer homes have R-13 fiberglass batts, which is adequate but not optimal. Cavities without proper air sealing allow convection currents that bypass insulation entirely, defeating its purpose.
Air leaks are distinct from insulation but equally important. An envelope can have high-R insulation everywhere but still leak conditioned air through gaps around ductwork, electrical outlets, windows, and building penetrations. The American Society of Heating, Refrigerating and Air-Conditioning Engineers (ASHRAE) emphasizes that sealing air leaks often delivers better cost-effectiveness than increasing insulation depth alone.
Insulation R-Values and What They Mean for Your System
R-value measures thermal resistance - how effectively a material blocks heat transfer. Higher R-values mean better insulation, but the relationship to energy savings is not linear. Doubling R-value from R-19 to R-38 does not cut your costs in half; it reduces heating and cooling energy by roughly 30-40%, depending on climate and air sealing quality.
The DOE recommends specific R-value targets by climate zone. Northern climates (zone 6 and above) recommend R-38 to R-49 for attics; southern climates recommend R-30 to R-38. Most homes are under-insulated relative to these guidelines.
Each additional inch of insulation costs roughly the same to install but delivers diminishing returns. The difference between R-19 and R-30 is dramatic - roughly 25% energy savings. The difference between R-49 and R-60 is minimal - roughly 3-5% additional savings. Your optimization point is usually R-30 to R-38 for attics in cold climates, unless your utility costs are exceptionally high.
The type of insulation matters less than coverage, air sealing, and installation quality. Fiberglass batts are cheapest; cellulose and spray foam perform better when installed correctly. For attic work, the Owens Corning 512 SQFT 8 Bags of R-38 Unfaced 24 by 48 Fiberglass Batt Fits 2X12 attic is one option for an attic upgrade. The critical step is ensuring batts are pressed firmly into cavities without compression and that the attic floor is fully covered with no gaps or shortcuts.
Step-by-Step Guide to Assess and Upgrade Your Insulation
A methodical approach targets high-impact areas first and prevents wasted effort and money.
-
Inspect your attic for existing insulation depth and type. Access the attic through a scuttle hole or pull-down stair. Note the depth of existing insulation in several spots. If depth is less than 7 inches, your attic is under-insulated relative to modern standards. Check for moisture staining, mold, or deterioration; address those issues before adding new insulation.
-
Check your basement and rim joist. Basement walls should have insulation on at least the upper 4-8 feet. The rim joist must be sealed and insulated to prevent heat loss and infiltration. Look for gaps around pipes, wiring, and foundation penetrations. If the basement is unfinished and completely uninsulated, this is a high-priority upgrade area in cold climates.
-
Identify and seal obvious air leaks before adding insulation. Attic air leaks around recessed lights, exhaust vents, and ductwork penetrations dramatically reduce insulation effectiveness. Seal these gaps with caulk or spray foam before adding new material. When dealing with ductwork, reference How To Seal Ductwork Leaks With Mastic And Tape Like A Pro for detailed sealing techniques. The 3M Scotch Rubber Mastic Tape 2228, 1 in x 10 ft, Black, 1 Roll is one option for sealing ductwork connections.
-
Calculate your target R-value using DOE guidelines for your climate zone. Look up your zip code’s recommended R-value through the DOE’s energy savings calculator online. Measure your current attic depth and multiply by the R-value per inch of your existing insulation type (typically R-3.2 per inch for fiberglass). Calculate the gap between current and target R-value. This tells you exactly how many inches of new insulation to purchase.
-
Install new insulation, starting with the attic. Attic upgrades deliver the fastest return on investment. Use unfaced batts or blown-in cellulose for additions to existing insulation (faced batts should only be the first layer against conditioned space). Lay new insulation perpendicular to existing batts to cover all seams and gaps. Do not block soffit or ridge vents; use baffle vents to maintain critical airflow from soffit vents to the ridge vent.
-
Move to basement rim joists and walls after attic work. Seal all rim joist penetrations with caulk or spray foam, then install rigid foam board (R-5 per inch) or fiberglass batts. For above-grade basement walls, R-15 to R-21 is adequate; for below-grade walls, R-10 to R-15 is standard practice.
-
Use thermal imaging to verify your work and identify remaining problem areas. The Flir One Pro - Thermal Imaging Camera for iOS Smartphones (iPhone 15 and Newer w/USB-C) can help you look for cold spots on walls and ceilings after your upgrade, indicating areas with inadequate insulation or remaining air leaks that need attention.
Common Insulation Mistakes Homeowners Make
Most insulation upgrades fail to deliver their full potential because of predictable, preventable mistakes that are easy to make but easy to avoid with proper knowledge.
Compressing fiberglass batts. This is the most common error. Homeowners stuff batts too tightly into cavities or compress them to fit into shallow spaces. Fiberglass insulation works by trapping dead air within the material matrix. When compressed, the air is expelled, and R-value drops proportionally - often by 20-40%. A compressed R-19 batt may only perform at R-12 to R-15 in actual value. The solution is simple: let batts expand to their full thickness without forced compression.
Installing faced batts backwards. Faced batts with kraft paper or foil vapor retarders must always face the conditioned space (interior), never toward the attic or exterior wall. Installing them backward traps moisture in the cavity and causes rot and mold growth over time. Always verify facing orientation before installation and mark the correct direction on boxes before you start work.
Not sealing air leaks before adding insulation. Adding insulation without sealing air leaks is incomplete work. Convection currents within and around insulation bypass its thermal resistance entirely. A poorly sealed attic with R-60 insulation will still leak air around ductwork, recessed lights, and vent penetrations. Seal air leaks first, then add or upgrade insulation as a second step.
Blocking attic ventilation pathways. Attic ventilation is critical for preventing moisture buildup and ice dams during winter. When upgrading attic insulation, homeowners often accidentally block soffit vents with batts or blown-in material. The result is trapped moisture, mold growth, and roof rot. Always install baffle vents between rafters to maintain continuous airflow from soffit to ridge vent.
Insulating wrong priority areas first. A homeowner in the South who adds R-49 to the attic but leaves the basement and rim joist completely uninsulated is wasting money. Prioritize insulation upgrades based on your climate zone. In the South, attic insulation is highest priority; in the North, focus on attic and basement equally; in mild climates, basement and rim joist sealing often yield the best energy return per dollar.
Failing to account for moisture risk and local codes. In high-moisture climates (South and Pacific Northwest), vapor barriers can trap moisture and cause rot if installed incorrectly. In cold, dry climates, they prevent winter moisture damage. Know your climate zone and research local building code requirements before starting. Consult a professional energy auditor when building science decisions are uncertain.
FAQ
How much insulation do I actually need in my attic?
The answer depends on your climate zone, which can be determined through the DOE’s online energy savings calculator by entering your zip code. Most of North America should aim for R-30 to R-38 in the attic as a baseline. Northern climates (zone 6 and above) typically need R-38 to R-49; southern climates need R-30 to R-38. The sweet spot for most homeowners is R-38, as the cost-benefit ratio declines sharply beyond that level. If your attic currently has R-19 or less, upgrading to R-30 will return your investment through energy savings within 5-8 years in most climates. The time-to-ROI is often even shorter in regions with long heating or cooling seasons.
Can I add new insulation on top of old insulation?
Yes, absolutely. Layering new insulation over existing material is the most practical and cost-effective upgrade method for attics. Use unfaced batts or blown-in cellulose or fiberglass on top of your existing insulation. Never use faced batts on top layers, as the kraft paper or foil vapor retarder can trap moisture between layers. Your existing insulation provides its R-value contribution; the new material adds to it. Always ensure attic vents are not blocked by new insulation, and maintain 3-inch clearance around recessed lights and other heat-producing equipment per code.
Will better insulation reduce my HVAC system’s runtime significantly?
Yes, very much so. A well-insulated home with proper air sealing typically reduces HVAC runtime by 20-40%, depending on how poorly insulated it was before the upgrade. Shorter runtimes mean lower energy bills, less wear on compressors and motors, and longer overall system life. This is one of the most compelling reasons to prioritize insulation improvements before or alongside HVAC equipment upgrades. Investing $3,000-5,000 in attic and basement insulation can deliver better energy savings over 10 years than investing $8,000-12,000 in a new high-efficiency HVAC system alone.
Should I hire a professional for insulation work, or can I DIY?
Attic insulation is among the most homeowner-friendly DIY projects. Laying batts or blowing in cellulose requires no special tools, skills, or certifications. However, if your attic has existing mold, active moisture damage, pests, buried wiring, or complex ductwork, hire a professional insulation contractor. Basement insulation and rim joist work can be DIY-friendly if you’re comfortable with basic carpentry and using caulk and spray foam safely; spray foam application in particular benefits from professional installation for safety, performance, and warranty reasons. Get at least one professional energy audit to identify upgrade priorities and verify your approach before beginning work.
How do I know if my insulation upgrades are actually working?
Monitor your utility bills over the next full heating and cooling season; you should see a 10-20% reduction in consumption if you’ve properly sealed air leaks and increased R-value appropriately to your climate. Signs of inadequate insulation include uneven room temperatures, persistently high bills during peak seasons, and visible condensation on windows during cold weather. A thermal imaging camera can reveal cold spots on walls and ceilings. Professional blower door testing is the definitive method to verify air sealing effectiveness and identify remaining leakage pathways.
A Safety Note on HVAC and Home Insulation
When upgrading insulation or working with your HVAC system, always ensure your home has a functioning carbon monoxide detector installed on each level, particularly near bedrooms and on stairways. Carbon monoxide (CO) is an odorless, colorless gas produced by furnaces, water heaters, and other combustion appliances. Poor ventilation or blocked exhaust venting can allow CO to accumulate to dangerous levels indoors. When upgrading insulation, you may inadvertently seal ventilation pathways or restrict combustion air supply. After any major air sealing or insulation work that affects your attic or basement, have a qualified HVAC technician inspect your furnace venting, test CO levels, and verify that combustion air supply is adequate. If your heating system is more than 15 years old or shows signs of rust, cracks, or yellow burner flames, call a professional before attempting any insulation work near the furnace or venting. Never attempt furnace repairs or modifications yourself; heating system work requires proper licensing and certification for your safety.
Your HVAC system cannot overcome a leaky, under-insulated building envelope. Before upgrading your furnace, air conditioner, or heat pump, ensure your insulation meets regional standards and your air sealing is thorough. The return on insulation investment is typically 5-8 years for attic upgrades and 7-10 years for basement work - comparable to or better than many HVAC equipment replacements, while improving comfort and extending system life by years.
Start with a professional energy audit if your budget allows, or begin with a DIY attic inspection and R-value calculation. Prioritize your climate zone’s recommended targets, seal air leaks before adding insulation, then install insulation in layers. Every dollar invested in proper insulation reduces your HVAC workload, lowers energy bills, and extends system durability.
Ready to upgrade your insulation? Start with your attic this week. Calculate your target R-value, identify air leaks, seal them with caulk or foam, then install new material. Proper insulation is the single best investment you can make for HVAC efficiency.
- How To Lower Your Electric Bill During Peak Summer Cooling Months
- Hvac Rebates And Tax Credits Homeowners Should Know About
Bookmark this guide for the next time you work through how home insulation affects your hvac efficiency and energy bills, and use the related resources below to keep improving your setup. —